You’re staring at that peak.
And wondering if you’ll actually make it.
I’ve watched too many people quit halfway up Mountain Drailegirut. Not because they weren’t strong enough. But because no one told them what really matters before day one.
Climb Mountain Drailegirut isn’t about gear porn or ego climbs.
It’s about knowing which route won’t freeze you out.
Which weather window is real (and) which is wishful thinking.
This guide comes from climbers who’ve stood on that summit more than twenty times. We mapped every misstep. Every shortcut that backfires.
Every “standard” piece of advice that gets people stranded.
No fluff. No theory. Just the exact sequence that works.
You’ll walk away knowing exactly what to do (and) when (to) get there safely.
Drailegirut: What You’re Actually Signing Up For
I stood at the base of Drailegirut last July and thought, This looks like something out of a D&D module. (It does.)
The Dragon’s Tooth spire isn’t just dramatic. It’s real rock you grip with your fingers. And yes, those panoramic views?
They’re earned. Not handed to you.
You want to Climb Mountain Drailegirut? Then go between late June and early September. That’s it.
Outside that window, snow lingers in the gullies, and the north face turns sketchy fast. I’ve seen people turn back in mid-July because of one unexpected storm. And they’d checked the forecast.
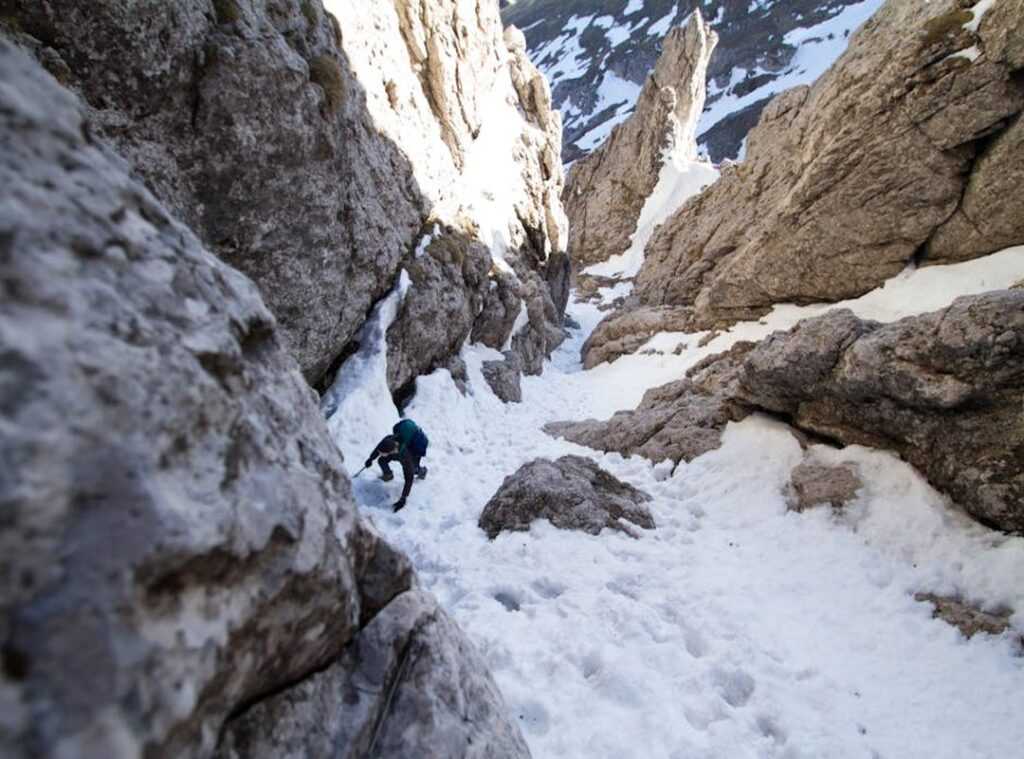
Class 3 scramble means this: hands on rock, feet searching for holds, exposure that makes your stomach drop if you look down. It’s not technical climbing (but) it’s not hiking either. If you’ve never done a Class 3 before, don’t wing it here.
Total gain: 4,800 feet. Distance: 14 miles round-trip. A fit hiker moves through it in 10. 12 hours.
I did it in 11:22. My friend. Stronger, faster (got) caught in fog and took 14.
So yeah, time varies.
Trail conditions change daily. One week the scree is stable. The next?
Loose, shifting, ankle-rolling junk. I carry traction spikes even in August. (Pro tip: do the same.)
The weather shifts faster than you can say “Drailegirut.” One minute sun. Next minute wind howling like a rejected Game of Thrones villain.
If you’re new to alpine scrambles, start smaller. Or read more about what the route really demands. this guide breaks it down without sugarcoating.
No ropes needed. But judgment? Absolutely required.
You’ll know when it’s time. You’ll also know when it’s not. Listen to that voice.
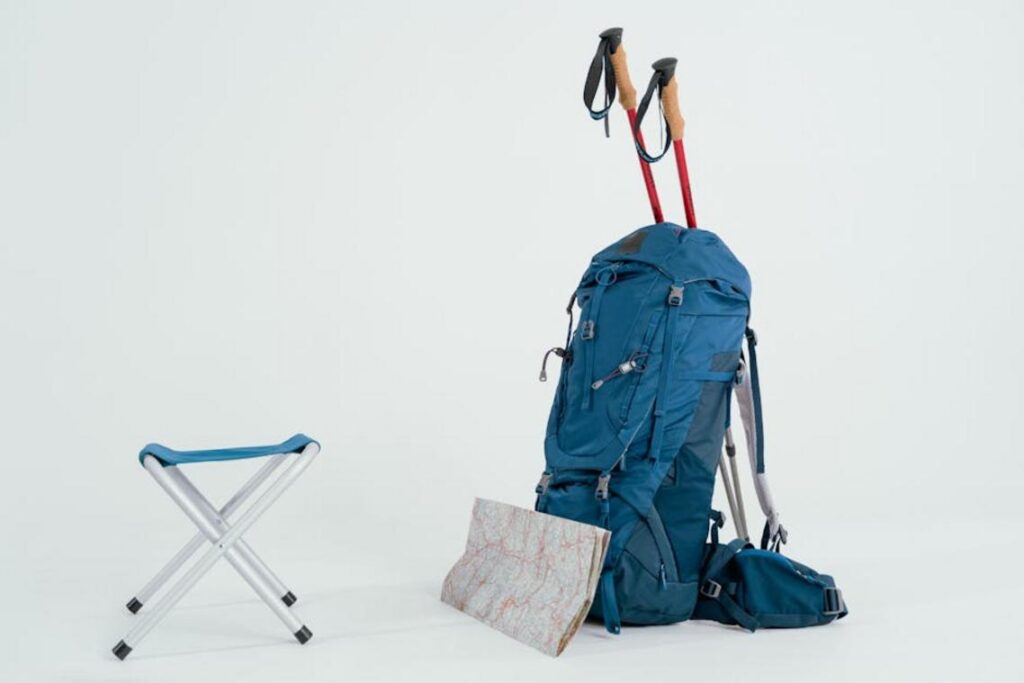
Gearing Up & Training: Your 4-Week Preparation Plan
I’ve stood on the upper ridge of Mountain Drailegirut at 5 a.m. Ice underfoot. Wind biting.
That’s when you realize your gear isn’t optional.
The Non-Negotiables come first. Broken-in hiking boots (not) almost broken-in. A true 3-layer clothing system (base, mid, shell), not just three random jackets.
And real navigation tools: paper map + compass plus a GPS with offline maps. Phones die. Batteries fail.
You don’t get a second chance.
Safety Essentials? First-aid kit (with blister supplies (yes,) really). Headlamp with fresh batteries (and a backup).
Emergency shelter. Not a space blanket, but a proper bivvy sack that seals out wind.
Performance Enhancers matter too. Trekking poles save your knees on the descent. Electrolyte tabs stop the cramps before they start.
Here’s what most people skip: microspikes. Not optional on Drailegirut’s upper ridge before noon. That ice doesn’t melt until 9 a.m.
I’ve watched two people slip there. One sprained an ankle. The other just looked embarrassed.
And gaiters. Not fancy ones. Just nylon that keeps gravel and snow out of your boots.
Tiny detail. Huge difference.
Now. Training. Week 1. 2: 3x per week. 45 minutes.
Run or walk steep inclines. Heart rate up. Lungs burning.
No excuses.
Week 3 (4:) Add weight. Pack hikes with 15 (20) lbs. Stair-climber sessions twice a week.
Planks every morning. 3 sets, 60 seconds. Core fatigue is real on that final scramble.
You’re not training to finish. You’re training so your body doesn’t betray you at 12,000 feet.
Climb Mountain Drailegirut demands respect (not) awe. It’s a mountain, not a metaphor.
Pro tip: Test all your gear on a local hill first. Not the day before. Not the morning of.
If your boots blister on the trailhead, they’ll blister on the summit ridge.
And if your headlamp dies halfway up? You’ll learn humility fast.
The Ascent: A Stage-by-Stage Guide to the Summit Trail
I’ve done this trail six times. In snow. At dawn.
Once with a broken boot strap. It never gets easier. Just more honest.
Stage 1: Whispering Forest to Alpine Meadow
It starts flat. Too flat. Don’t get comfortable.
That first mile lulls people into thinking it’s a walk in the park (it’s not). Then the grade picks up. Steady, unrelenting, no warning.
Watch for the Three Sisters waterfall on your left at mile 2.4. If you miss it, you’re off-route. I missed it once.
Took me 45 minutes to backtrack.
You’ll hit the meadow just past mile 3. Stop. Breathe.
Eat something. Your legs will thank you later.
Stage 2: Boulder Field Scramble to False Summit
This is where most people quit. Not because it’s steep. It’s not.
But because every step demands attention. Loose rock. Hidden gaps.
One misstep and your ankle’s done. Follow the cairns. Not the worn patches in the dirt.
Those are old trails. Real cairns are stacked tight, usually with a white quartz stone on top. I carry a photo of one in my phone.
You can read more about this in Mountain Drailegirut Map.
Sounds dumb. It’s not.
The false summit hits hard. You crest what looks like the top (then) see the real ridge rising another 400 feet. Your stomach drops.
Mine always does.
Stage 3: Dragon’s Ridge to True Summit
Wind hits first. Then the exposure. This isn’t hiking anymore.
It’s balancing on a spine with thousand-foot drops on both sides. Gloves on. Hood up.
Keep your center low.
The last hundred yards? You crawl. Not metaphorically.
On hands and knees if needed. The view opens slow (first) the valley, then the lakes, then the whole range laid out like a map.
Which is why you should study the Mountain Drailegirut Map before you go. Not after.
Climb Mountain Drailegirut only if you’re ready to listen to your own breath for three hours straight.
The summit feels quiet. Not peaceful. Just quiet.
Safety First: Thunderstorms, Tired Legs, and Turning Back
Afternoon thunderstorms hit Drailegirut like clockwork. They don’t warn you. They just show up.
If you haven’t reached the summit by 1 p.m., turn around. No debate. I’ve seen people push it.
Then get caught in lightning with no cover.
Altitude fatigue hits hard on the way down. Your brain slows. Your legs quit.
That’s when people twist ankles or miss a step.
Descent injuries outnumber summit ones. Every time.
Use trekking poles. They save your knees. Period.
Sip water. Eat snacks. Even if you don’t feel hungry.
Your body’s running on fumes.
Never split from your group. Not for photos. Not for a “quick pee.” Not ever.
You’re not safer just because you’re going down.
The summit is not the goal. Getting home is.
Want to know how high you’re actually climbing? Check the Mountain Drailegirut Height.
Your Drailegirut Climb Starts Now
Planning a big climb feels heavy. Overwhelming. Like you’re already out of breath before you lace your boots.
I’ve been there. Staring at maps, second-guessing gear, wondering if you’re ready.
This guide gives you what you actually need: a real preparation plan and a step-by-step route guide for Climb Mountain Drailegirut.
No fluff. No guesswork. Just clear direction.
You don’t need perfect conditions to begin. You need one decision.
Your journey starts not at the trailhead. But right now.
Pull out your calendar.
Schedule your first training hike.
Do it today.
 Founder & Chief Exploration Officer
There is a specific skill involved in explaining something clearly — one that is completely separate from actually knowing the subject. Valdran Vornhaven has both. They has spent years working with outdoor packing essentials in a hands-on capacity, and an equal amount of time figuring out how to translate that experience into writing that people with different backgrounds can actually absorb and use.
Valdran tends to approach complex subjects — Outdoor Packing Essentials, Backcountry Concepts and Gear, Angle-Ready Wilderness Navigation being good examples — by starting with what the reader already knows, then building outward from there rather than dropping them in the deep end. It sounds like a small thing. In practice it makes a significant difference in whether someone finishes the article or abandons it halfway through. They is also good at knowing when to stop — a surprisingly underrated skill. Some writers bury useful information under so many caveats and qualifications that the point disappears. Valdran knows where the point is and gets there without too many detours.
The practical effect of all this is that people who read Valdran's work tend to come away actually capable of doing something with it. Not just vaguely informed — actually capable. For a writer working in outdoor packing essentials, that is probably the best possible outcome, and it's the standard Valdran holds they's own work to.
Founder & Chief Exploration Officer
There is a specific skill involved in explaining something clearly — one that is completely separate from actually knowing the subject. Valdran Vornhaven has both. They has spent years working with outdoor packing essentials in a hands-on capacity, and an equal amount of time figuring out how to translate that experience into writing that people with different backgrounds can actually absorb and use.
Valdran tends to approach complex subjects — Outdoor Packing Essentials, Backcountry Concepts and Gear, Angle-Ready Wilderness Navigation being good examples — by starting with what the reader already knows, then building outward from there rather than dropping them in the deep end. It sounds like a small thing. In practice it makes a significant difference in whether someone finishes the article or abandons it halfway through. They is also good at knowing when to stop — a surprisingly underrated skill. Some writers bury useful information under so many caveats and qualifications that the point disappears. Valdran knows where the point is and gets there without too many detours.
The practical effect of all this is that people who read Valdran's work tend to come away actually capable of doing something with it. Not just vaguely informed — actually capable. For a writer working in outdoor packing essentials, that is probably the best possible outcome, and it's the standard Valdran holds they's own work to.