
If you’re searching for a practical, no-nonsense backcountry camping shelter guide, you likely want clear answers: What shelter should you bring? How do you choose for terrain and weather? What actually works when conditions turn harsh? This article is built to give you exactly that.
We break down the most reliable shelter options for backcountry travel—from ultralight tents and tarps to bivy systems and natural shelters—so you can match your setup to your environment, skill level, and trip length. You’ll learn how to balance weight, protection, and packability, plus key considerations for wind exposure, precipitation, elevation, and seasonal shifts.
Our guidance draws from extensive field testing in varied wilderness conditions, hands-on gear evaluations, and proven survival principles. Instead of theory, you’ll get practical insights that translate directly to safer, more comfortable nights outdoors.
By the end, you’ll know exactly how to choose, pitch, and rely on a shelter system that won’t let you down when you’re miles from the trailhead.
Your Wilderness Stronghold: A Guide to Backcountry Shelter
A shelter is more than a tent; it is your barrier against wind, rain, cold, and wildlife. In simple terms, shelter strategy means choosing and building a campsite that reduces risk before problems start. Many hikers assume flat ground is enough. It is not.
Think in three layers:
- Site selection: Pick elevated ground to avoid pooling water.
- Setup mechanics: Anchor stakes at 45-degree angles for tension.
- Environmental respect: Follow Leave No Trace principles.
This backcountry camping shelter guide clarifies each step so your camp becomes protection, not vulnerability outdoors.
The Foundation: How to Read the Land and Choose Your Site
Before you even think about pitching your tent, pause. Walk the area. Look around. The right location is 90% of the battle for a good night’s sleep (and for not waking up in a puddle at 2 a.m.).
The 5 Ws of Site Selection
Wind: First, determine the prevailing wind direction—meaning the direction the wind typically blows in that area. You can spot clues in bent grass, flagging tree branches, or drifting clouds. Whenever possible, use natural windbreaks like dense tree clusters, large boulders, or small terrain rises. On the other hand, avoid exposed ridgelines and open clearings where gusts can batter your shelter all night.
Water: Camp at least 200 feet from lakes and streams. This protects fragile riparian areas (the ecosystems along water sources) and reduces insect pressure. While access to water matters, never set up in low spots or dry creek beds. Flash floods can happen fast—even if the sky above you looks clear.
Wood: If fires are allowed, check for dead and downed wood nearby. Dead and downed means fallen, dry branches—not standing trees. Cutting live wood damages the landscape and burns poorly anyway.
Widowmakers: Always look up. Scan for dead limbs or leaning trees that could fall in wind. This step is non-negotiable.
Weather: Finally, assess drainage and lightning risk. Avoid being the tallest object during storms, and choose slightly elevated ground so rain flows away from you.
Pro tip: Review a reliable backcountry camping shelter guide before your trip so these checks become second nature.
Your Shelter System: Choosing the Right Tool for the Trip
Your shelter is more than gear—it’s your margin of safety. In any solid backcountry camping shelter guide, you’ll see two dominant options: freestanding tents and tarp shelters. I’ve used both extensively, and I have opinions.
The Freestanding Tent
This is the all-in-one solution. A freestanding tent (a structure that holds its shape without stakes) offers reliable weather resistance, built-in bug protection, and fast setup. For beginners—or anyone expecting sideways rain and mosquito swarms—it’s the safer bet. The tradeoff? Weight and bulk. Ounces turn into pounds quickly (and you’ll feel every one on a steep ascent).
Some argue tents are overkill for mild trips. I disagree—predictable forecasts fail more often than we admit.
The Tarp Shelter
A tarp is a minimalist canopy pitched with trekking poles or trees. It’s lighter, more adaptable, and—when pitched well—surprisingly stormworthy. But skill matters. Knots, angles, site selection: get them wrong and you’ll have a long night. Ground moisture and insects also require extra planning.
Critics say tarps are uncomfortable. I think they’re empowering—if you’ve practiced.
Making the Call
- Season and storm risk
- Insect pressure
- Terrain and campsite options
- Your skill level
Your shelter should complement your clothing system—see layering systems explained staying comfortable in any climate. Choose confidence over trends.
The Mechanics of a Perfect Pitch: A Step-by-Step Process
A methodical setup process prevents mistakes and ensures a storm-worthy structure. Many campers assume pitching is intuitive—“just stake it and hope for the best.” That mindset works… until the first midnight wind gust flattens your shelter like a soda can.
Step 1: Ground Preparation
Clear the footprint area of sharp sticks, pinecones, or rocks that could puncture the floor. Do not dig trenches; modern tents are designed for surface runoff, and trenching damages soil. Instead, choose a naturally well-drained spot with slight elevation. (If water would pool there in a parking lot, it’ll pool there in the woods.)
Step 2: Orientation and Footprint
Lay down your footprint or groundsheet. Orient the shelter so the main door faces away from prevailing wind. This small adjustment dramatically reduces wind-driven rain intrusion—an often-overlooked detail in many guides, including the typical backcountry camping shelter guide.
Pro tip: Sprinkle a little water on the ground before pitching; watch which direction it flows to confirm drainage.
Step 3: Structure Assembly
For tents, assemble poles fully before inserting them—partial seating weakens structure. For tarps, tension your ridgeline first; it’s the load-bearing spine.
- Keep poles slightly flexed for strength distribution
- Use trees wider than 6 inches in diameter for tarp anchors
Step 4: Staking and Guylines
Stake corners first at a 45-degree angle, angled away for maximum holding power. Many competitors skip soil type considerations: sandy soil needs longer stakes; rocky soil benefits from Y-beam designs.
Step 5: Final Tensioning
Circle the shelter and tighten guylines evenly. A tight pitch sheds wind, reduces fabric fatigue, and keeps things blissfully quiet when the storm rolls in.
Advanced Techniques for Unforgiving Environments
When conditions worsen, basic skills may not be enough. Deadman anchors—buried objects like rocks or logs used instead of stakes—work in sand, snow, or frozen ground. Bury the object horizontally, tie guyline (the cord stabilizing your shelter), and compact the soil or snow.
For wildlife safety, create a work triangle: place your shelter, cooking area, and food storage at least 100 yards apart. This distance reduces scent overlap.
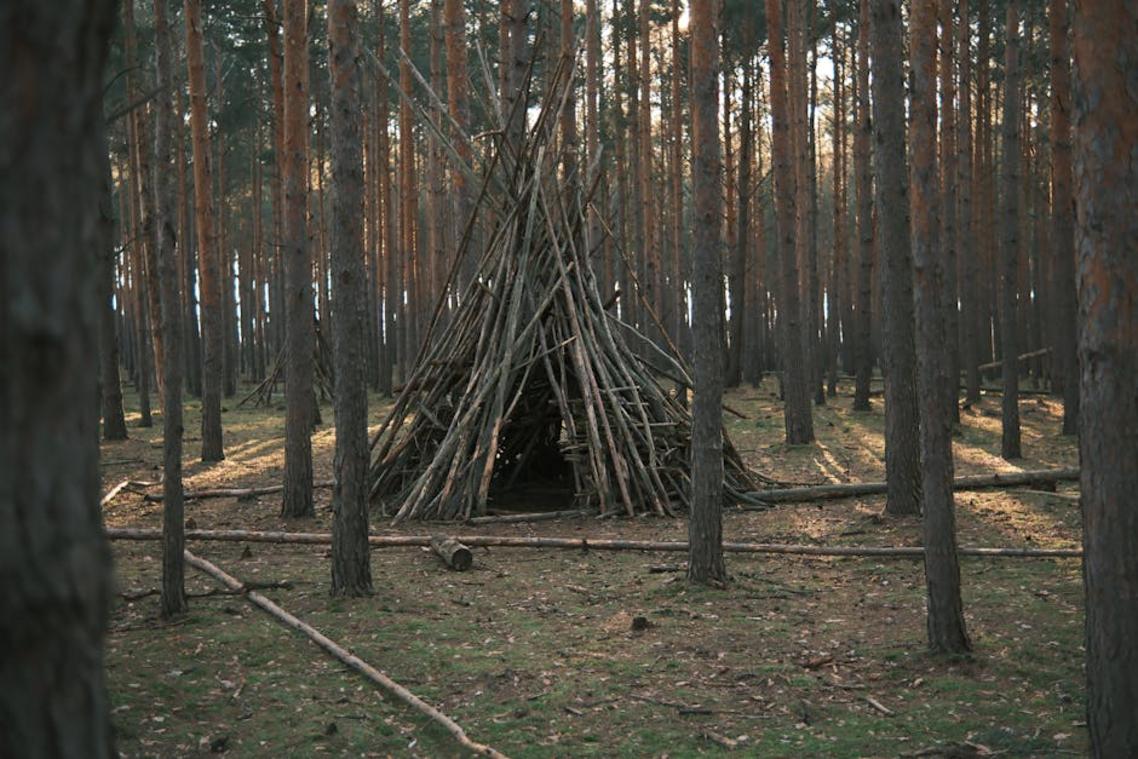
If gear fails, build a debris lean-to against a log, stacking branches and insulating with leaf litter (nature’s sleeping bag).
See a backcountry camping shelter guide.
Your shelter is more than fabric and poles; it is your backcountry lifeline. Treat it that way. Follow this backcountry camping shelter guide and commit to doing three things every trip:
- Choose high, dry ground away from dead trees and runoff paths.
- Pitch with precision, tightening guylines and checking stake angles.
- Test before dark, crawling inside to confirm warmth and wind protection.
Some argue any flat spot works. It doesn’t. Small mistakes compound fast in weather (nature has no pause button). Practice until setup feels automatic, and you’ll camp safer, sleep deeper, and wake ready for miles.
When selecting the ideal shelter for your backcountry camping adventure, it’s crucial to think about how your choice will impact other skills, like navigation, which makes understanding Common Orienteering Mistakes and How to Avoid Them even more essential.
Take Your Shelter Setup From Uncertain to Unstoppable
You came here looking for clarity on how to choose and set up the right shelter for your next trip—and now you have it. From understanding terrain and weather patterns to comparing tents, tarps, and hammocks, you’ve seen how the right decision can mean the difference between a miserable night and a safe, comfortable camp.
The real pain point isn’t just picking gear. It’s the fear of getting it wrong when you’re miles from help. A poor shelter choice can lead to lost sleep, exposure, and unnecessary risk. With the insights from this backcountry camping shelter guide, you’re no longer guessing—you’re preparing with purpose.
Now it’s time to act. Review your current setup, identify any weak points, and upgrade or practice before your next outing. Don’t wait until you’re caught in wind or rain to find out your system isn’t enough.
If you want proven backcountry strategies trusted by thousands of outdoor enthusiasts, explore our in-depth gear breakdowns and field-tested shelter tips today. Get the confidence, skills, and knowledge you need—then head into the wild ready for anything.
 Founder & Chief Exploration Officer
There is a specific skill involved in explaining something clearly — one that is completely separate from actually knowing the subject. Valdran Vornhaven has both. They has spent years working with outdoor packing essentials in a hands-on capacity, and an equal amount of time figuring out how to translate that experience into writing that people with different backgrounds can actually absorb and use.
Valdran tends to approach complex subjects — Outdoor Packing Essentials, Backcountry Concepts and Gear, Angle-Ready Wilderness Navigation being good examples — by starting with what the reader already knows, then building outward from there rather than dropping them in the deep end. It sounds like a small thing. In practice it makes a significant difference in whether someone finishes the article or abandons it halfway through. They is also good at knowing when to stop — a surprisingly underrated skill. Some writers bury useful information under so many caveats and qualifications that the point disappears. Valdran knows where the point is and gets there without too many detours.
The practical effect of all this is that people who read Valdran's work tend to come away actually capable of doing something with it. Not just vaguely informed — actually capable. For a writer working in outdoor packing essentials, that is probably the best possible outcome, and it's the standard Valdran holds they's own work to.
Founder & Chief Exploration Officer
There is a specific skill involved in explaining something clearly — one that is completely separate from actually knowing the subject. Valdran Vornhaven has both. They has spent years working with outdoor packing essentials in a hands-on capacity, and an equal amount of time figuring out how to translate that experience into writing that people with different backgrounds can actually absorb and use.
Valdran tends to approach complex subjects — Outdoor Packing Essentials, Backcountry Concepts and Gear, Angle-Ready Wilderness Navigation being good examples — by starting with what the reader already knows, then building outward from there rather than dropping them in the deep end. It sounds like a small thing. In practice it makes a significant difference in whether someone finishes the article or abandons it halfway through. They is also good at knowing when to stop — a surprisingly underrated skill. Some writers bury useful information under so many caveats and qualifications that the point disappears. Valdran knows where the point is and gets there without too many detours.
The practical effect of all this is that people who read Valdran's work tend to come away actually capable of doing something with it. Not just vaguely informed — actually capable. For a writer working in outdoor packing essentials, that is probably the best possible outcome, and it's the standard Valdran holds they's own work to.